The Heritage 23
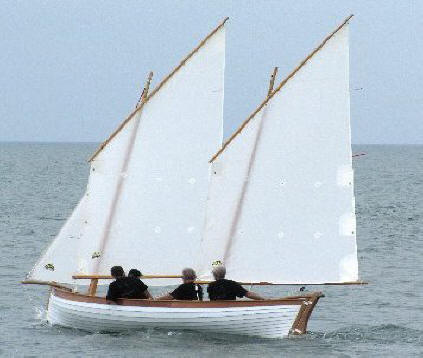
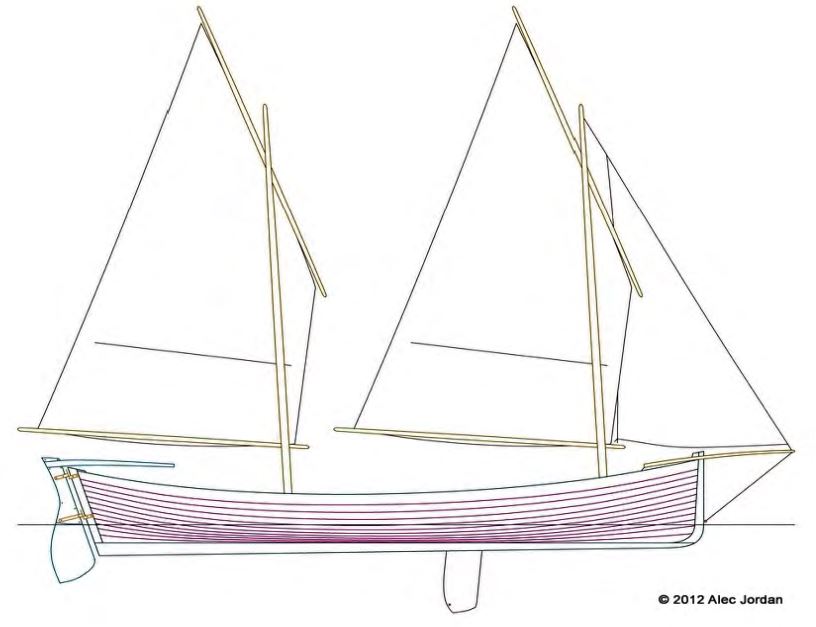
The Heritage 23 is a lugsail rigged, modernized Mackinaw boat. Mackinaw boats are classified as schooners and also fit the historic definition of cutters.. They were developed in our region in the 1800’s as fishing boats, cargo carriers and passenger haulers. Their size was typically bigger by about 1-1/2 times than the Heritage 23 displayed here and were normally gaff rigged.. A picture hanging in the Iosco County Building indicates that they were in common use on Tawas Bay.

- Drawing
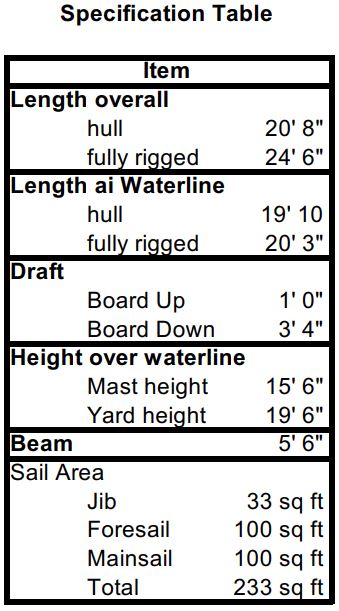
- Specifications
- Kit & Setup
- Molds, Frames and Planks
- Deck and Cockpit
- Launch and Shakedown
- Mast Construction
- Maintenance
Mackinaw Typical Rigging

Kit Designer: Alec Jordan of Jordan Boats, Fife, Scotland, took boat designer, Richard Pierce’s digitalized design and created a boat kit suitable for manufacture using Computer Numerically Controlled (CNC) machines to cut plywood sheets into parts. Jordan Boats is a 10 year old firm and has created numerous kits for other boat designers. Jordan pioneered the very successful St. Ayles skiff program of Scottish Coastal Rowing.
Alec Jordan of Jordan Boats
The Kit:
Jordan Boats’ United States producer is Hewes and Company of Blue Hill, Maine. Hewes Marine Division produces CNC parts for many yacht manufacturers as well as around 30 kits for Jordan, Wooden Boat Store and others. The Heritage Kit contains 15 sheets of plywood which include frames, molds, planks, “U” clamps, and thwarts. The individual parts are CNC cut in the plywood sheets. In many ways the process resembles the way we built balsa wood models by snapping the pre cut parts out of a sheet of balsa. Computer aided design sheets are available for viewing. The Heritage-23 workshop is located in East Tawas Michigan.
In addition: the following material is required:
- Residential Framing lumber for building frame (strong back).
- White Oak for Keelson, Keel, inner stems, outer stems, inwales, cleats, fairleads and rub rails.
- Bonding and finishing materials such as resins, microfibre, filler, solvent, varnish, marine paint.
- For sailing version: Douglas Fir for masts, booms and yards; jib, main and fore sails; various lines and fittings.
|
|
|
The kit parts can be seen on the wall along with our “design instructions”. The kit consisted of flat sheets of marine plywood that were laser CNC cut with “punch out” parts. The parts were not completely “cut” from the sheets but with the help of a small jig saw, the holding tabs on the cuts were easily removed to expose the part needed. After a bit of study, we laid up the hull frames on our work platform and had them in place to continue adding the planks from the “bottom” up.
The Build Process
- Build the Strong-Back (building frame). A key step is construction of a level and square building frame. The frame is constructed of residential framing lumber available at the local lumber yard.
Drawing of the Heritage 23 building frame.
- The kit from Hewes and Company as it was received is shown below. It contained 12 sheets of plywood.
- Leo Chartier opens the kit pallet. It was well packaged and was received without damage.
- Dave Gilles prepares to cut parts from a sheet of plywood. Note the CNC Router cuts surrounding the parts. Dave will cut small tabs holding the parts in the sheet. The parts being cut are clamps for use in bonding lapstrakes together on the boat.
- The plywood pallet was opened and the molds and parts were cut out. Molds are not part of the boat itself, but are placed on the strong-back and create the form around which the boat is built. The molds are made of residential grade plywood which is a slightly different color than the boat parts which are Okoume marine grade plywood.
- Install and shape keelson (hog): shape rectangular white oak board into shape to receive first pair of planks.
- Install Planks: Individual planks are composed of three parts and are bonded together by resin on scarf joints. The planks are installed in pairs and are bonded to the frames and each other with a 7/8″ overlap. Installing in pairs helps maintain symmetry. The Heritage 23 has 12 pairs of planks.
- The below photo shows 4 planks attached to the hull. Note the use of “U” shaped plywood clamps to apply pressure as the bonding resin and filler cures. The “U” shaped plywood clamps are CNC cut into unused parts of the kit plywood.
The above photograph shows then hull with 2 planks installed on each side. Note that the keelson is nearly covered by the first plank. Prior to installing the keel, the first pair of planks will be planed down to a flat surface with the keelson so that the keel will have a flat surface for bonding to the keelson. The above photograph shows then hull with 2 planks installed on each side. Note that the keelson is nearly covered by the first plank. Prior to installing the keel, the first pair of planks will be planed down to a flat surface with the keelson so that the keel will have a flat surface for bonding to the keelson.
Brian Bishop clamps a pair of planks to the inner-stem to hold it in place as the resin cures. Too much pressure squeezes out too much resin. The proper amount of pressure is key.
The planks and keelson have been prepared to receive the keel. Dave Gilles, Leo Chartier, and John Wilson insure the bonding surface is smooth
.
Mike Smith, Keith Jones, and Dave Gilles dry-fit the keel on the keelson.
After months of work, the builders are finally making big progress!
The Builders
The 12th plank (the whiskey plank) has been installed and is curing. Meanwhile, the builders present at the finish (left to right) Leo Chartier, David Wentworth, Dave Gilles, Mike Smith, John Wilson. Alec Jordan behind the hull were enjoying the Scotch whiskey.
Molds are installed on the strong-back building frame. It is important that they are properly spaced, are square to the building frame and are parallel with each other. Molds are not part of the boat itself, but provide the structure upon which the boat’s shape is created. Click on the thumbnails below for details of the progress.
[showmodule id=”813″]
When the boat was turned upright, work began on the interior. The surface was scraped, sanded and coated with epoxy. The centerboard trunk was built and installed. Flotation tanks and thwarts were added. The in-wales were laminated in place using 3/8″ thick white oak. Click on the thumbnails below for details of the progress.
[showmodule id=”829″]
July 6, 2012 was a perfect day for launching the Heritage 23. Clear sunny skies provided the backdrop for a somewhat nervous group of builders. The last minute crush of preparation was further complicated when the oar order did not arrive in time for the launch. A set of four temporary oars was manufactured in a couple of hours allowing the launch to take place as scheduled. YouTube has the boat launch activities. Click on the thumbnails below for launch day details.
[showmodule id=”857″]
Hand shaping the masts and bowsprit.
[showmodule id=”869″]
[showmodule id=”880″]
